The VIP Exhibitor Portal is the quickest and easiest way for exhibitors to view and edit their profile and lead scanning information. Through the VIP Exhibitor Portal, Exhibitors can:
- edit their exhibitor profile to include more details about their company/organization on the app
- upload PDFs of company materials and/or other related links for the app
- register booth staff that will be scanning leads for their company during the event
- edit their lead scanning form to include custom questions/fields to be included for leads scanned by their booth staff
- access a report of all leads scanned by their booth staff
This article includes information about:
- VIP Portal URL
- VIP Portal Login
- Editing your exhibitor profile on the VIP Portal
- Uploading a file or related link on the VIP Portal
- Registering additional booth staff on the VIP Portal
- Editing your booth's custom lead scanning form on the VIP Portal
- Accessing your lead scanning report on the VIP Portal
VIP Portal URL
To start, the event planner can access the VIP Portal URL from their event dashboard under App and Event Links.
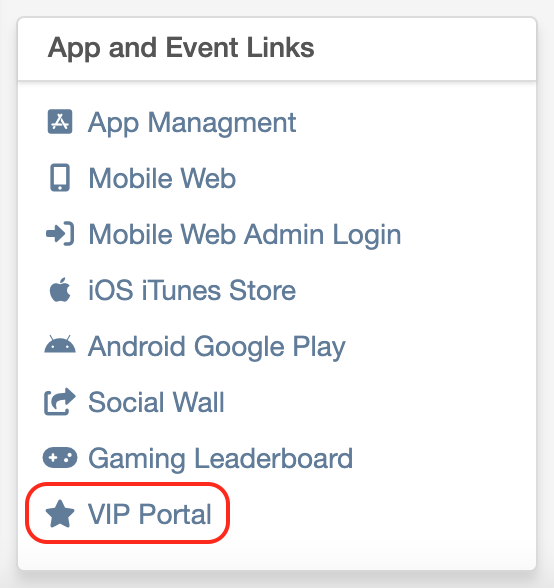
The event planner can then share the URL to the VIP Portal with each booth's Exhibitor VIP Admin.
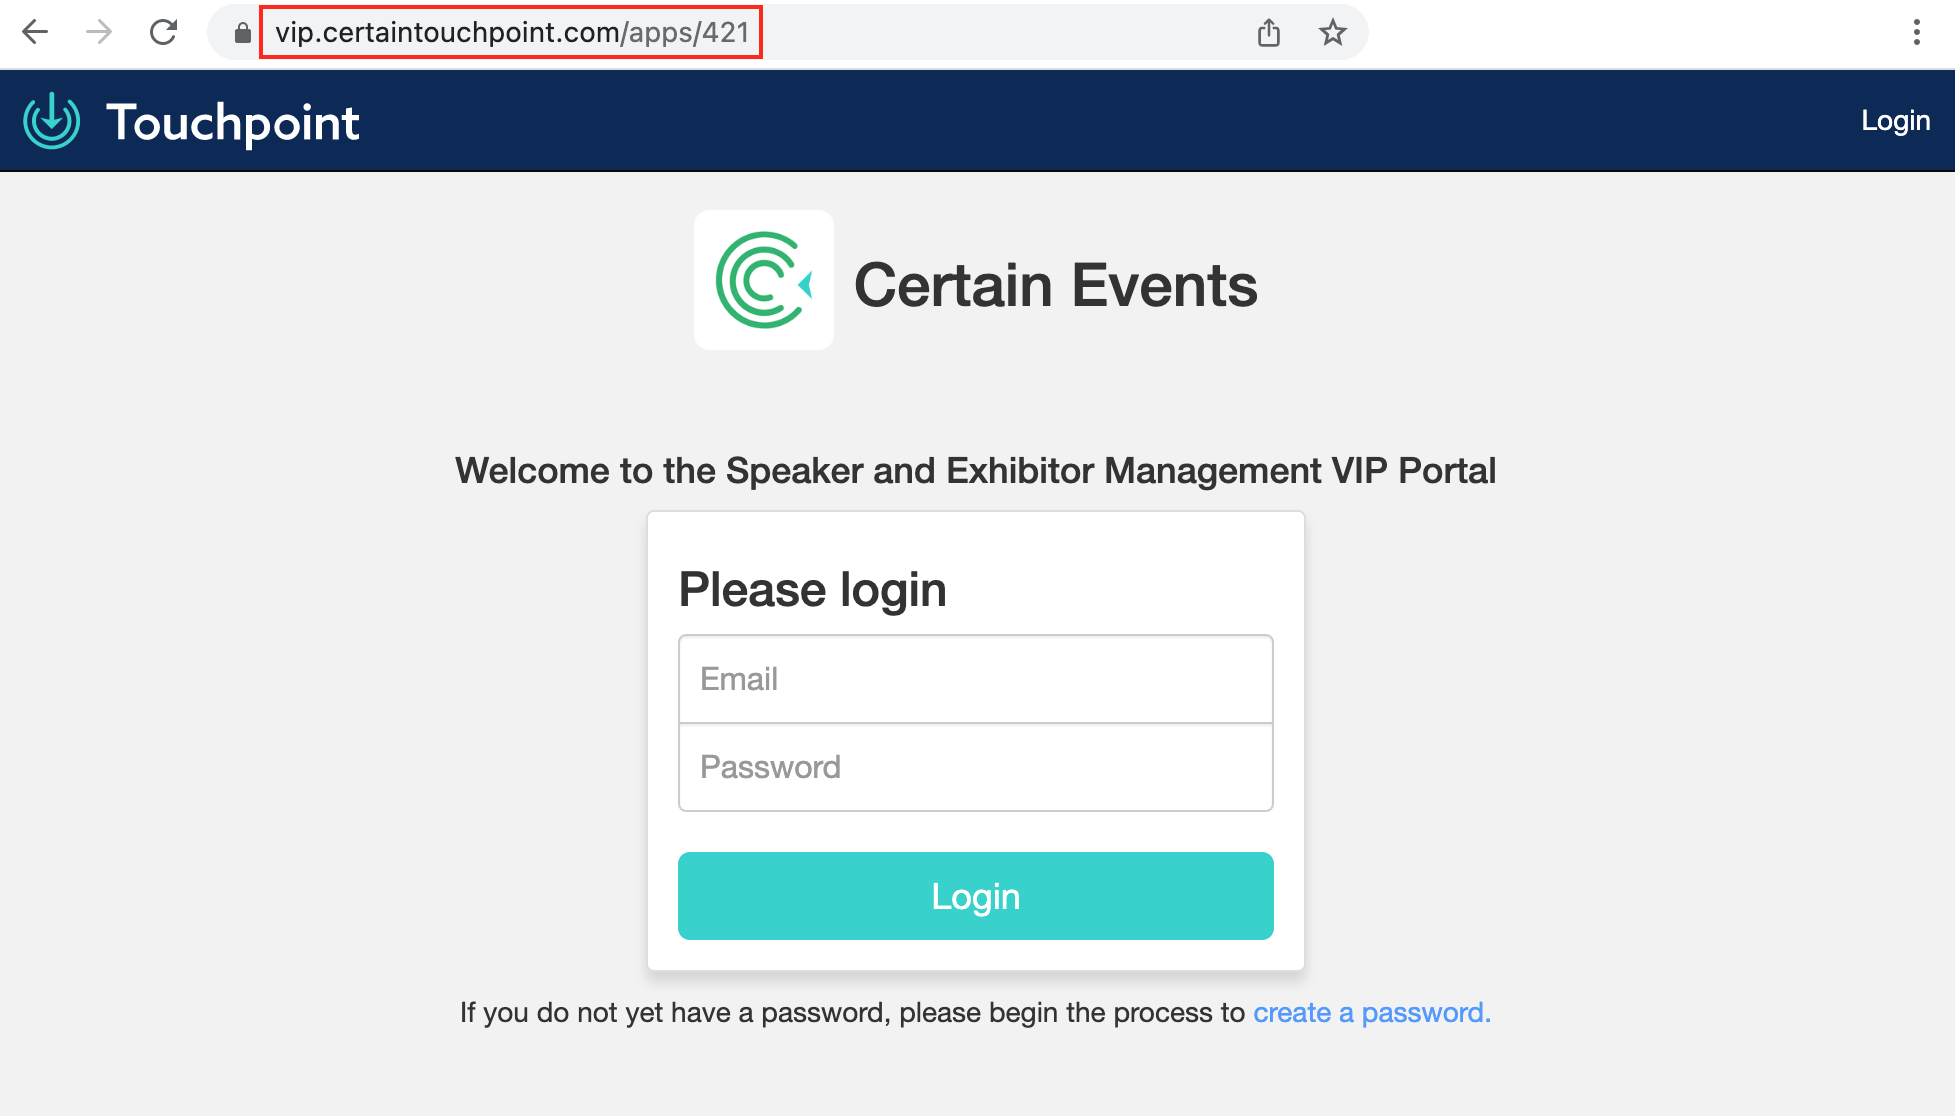
VIP Portal Login
NOTE: Each exhibitor record may have ONE Exhibitor VIP Admin who can access the Exhibitor VIP Portal. The Exhibitor VIP Admin will ONLY be able to access the VIP Exhibitor Portal if they are registered as a VIP Administrator on an exhibitor record in Touchpoint with a login email address.
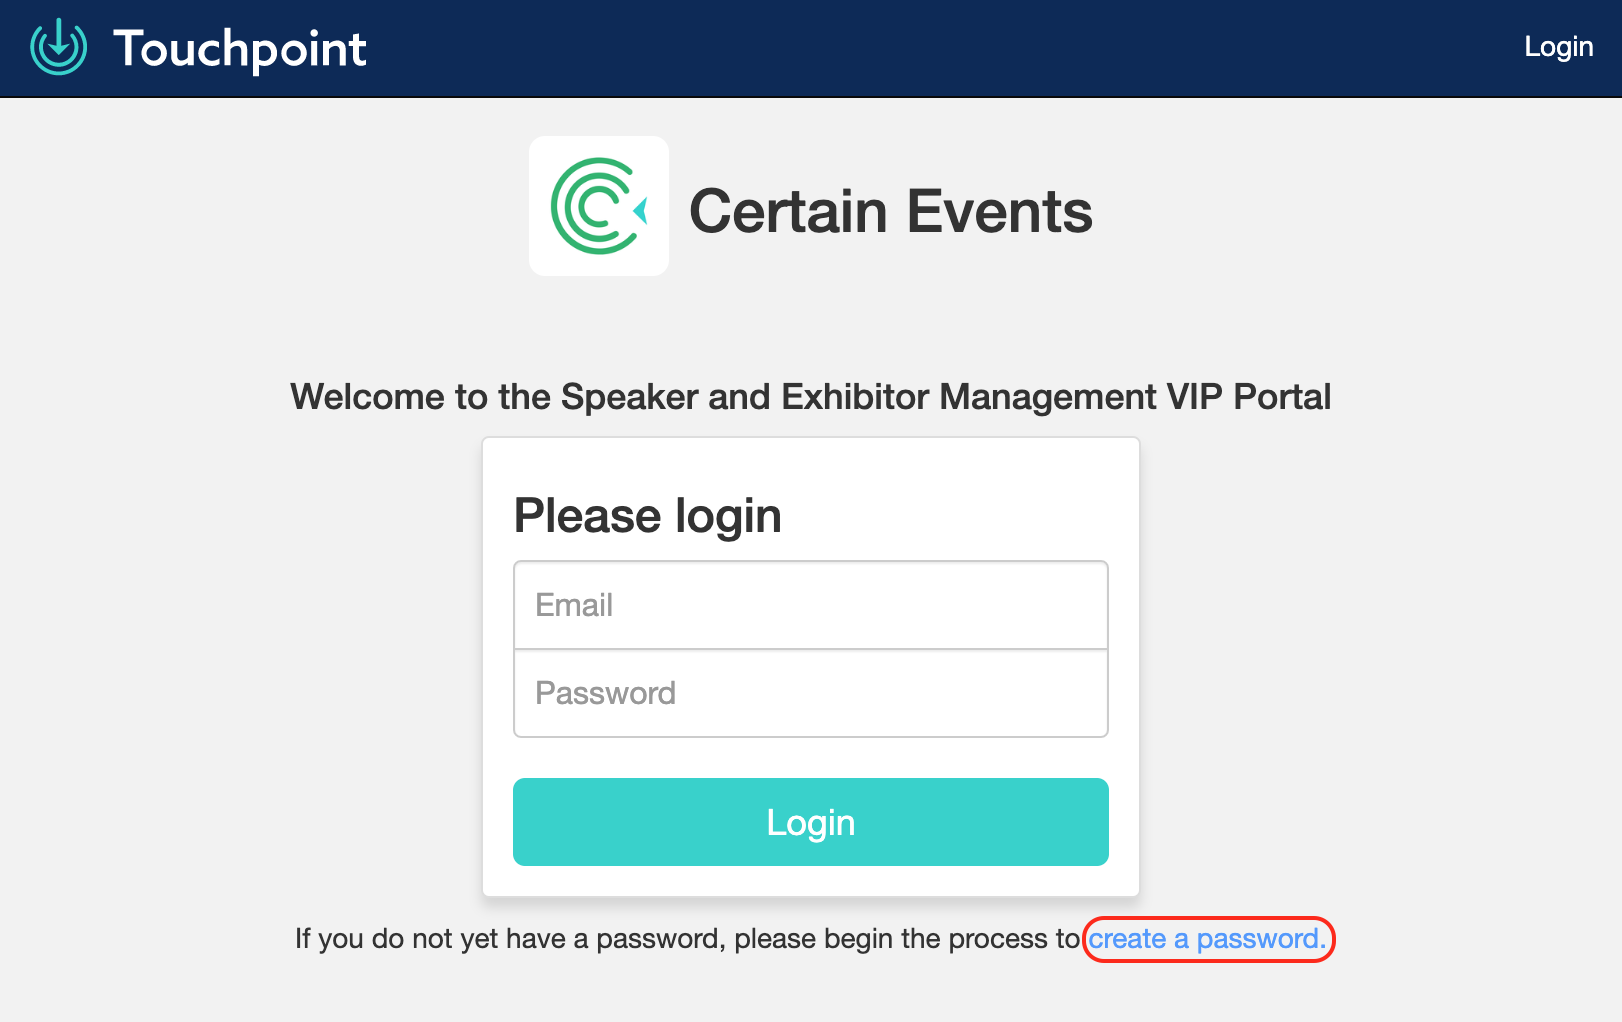
- When accessing the VIP Portal Login screen for the first time, the Exhibitor VIP Admin should click "create a password” at the bottom of the page.
- This will take you to a Password Setup page where they should enter their registered email address, then click Send Email.
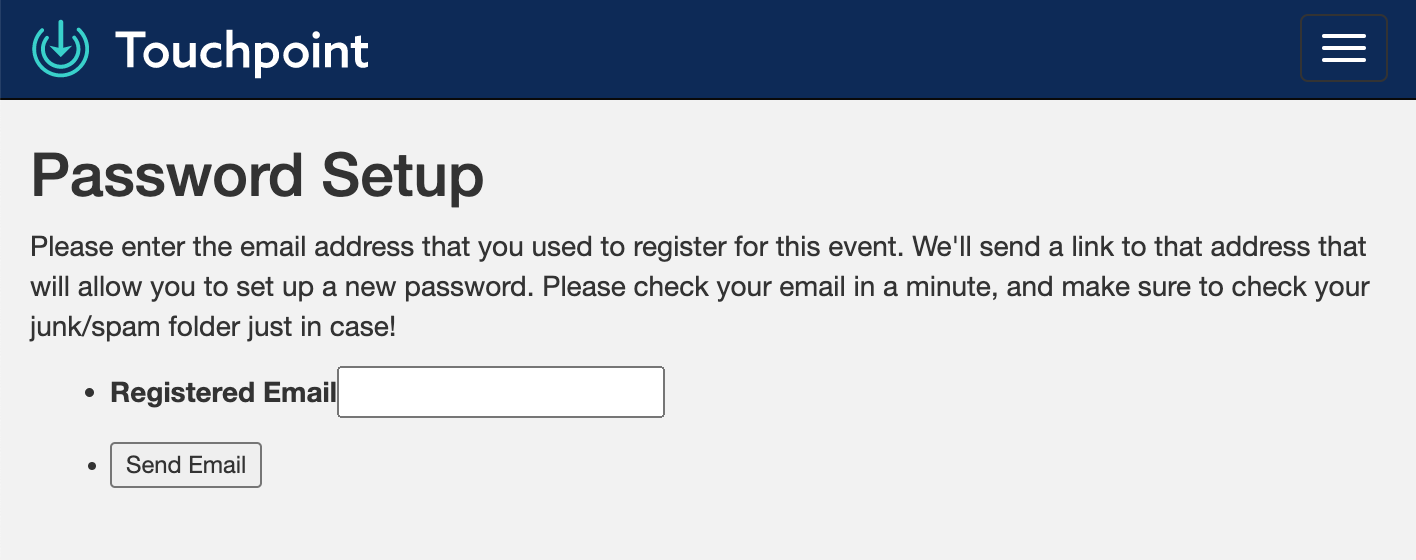
- The Exhibitor VIP Admin should then check their email and click the link in the email from donotreply@certaintouchpoint.com, follow the directions to create their password, then come back to the VIP Portal login page and log in.
Editing your exhibitor profile on the VIP Portal
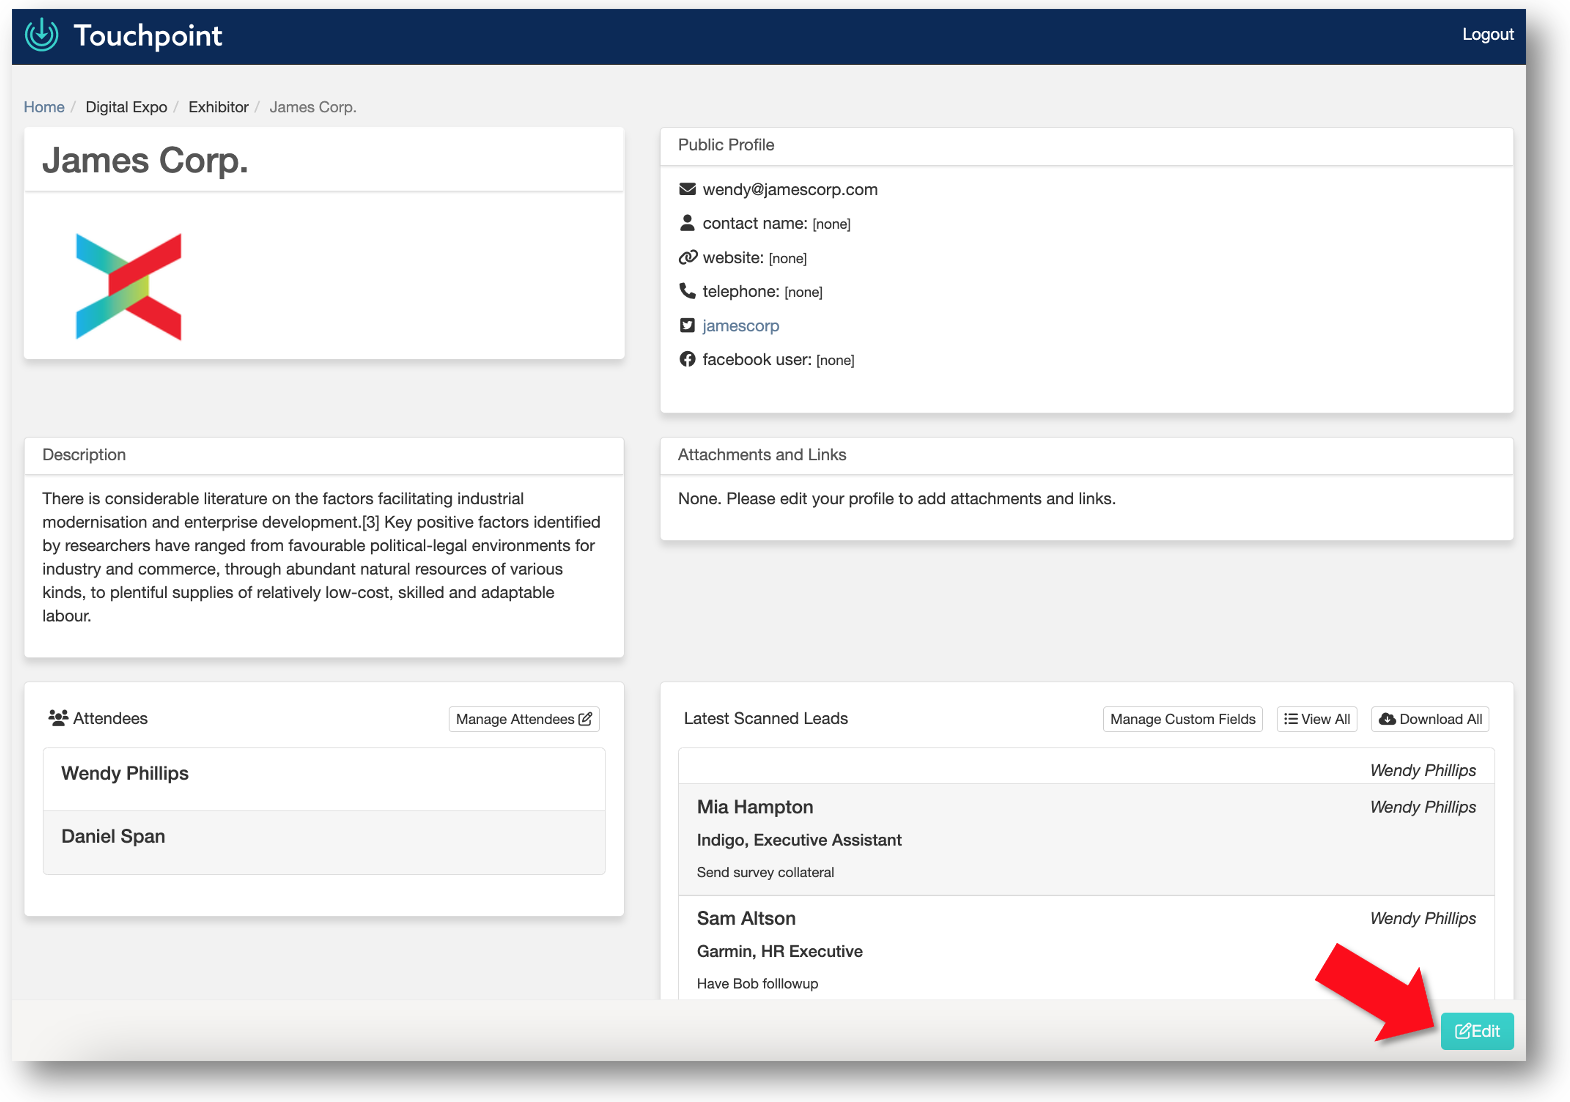
The Exhibitor VIP Admin can edit their exhibitor profile to include more details about their company/organization on the app.
- Click “Edit” at the bottom of the page.
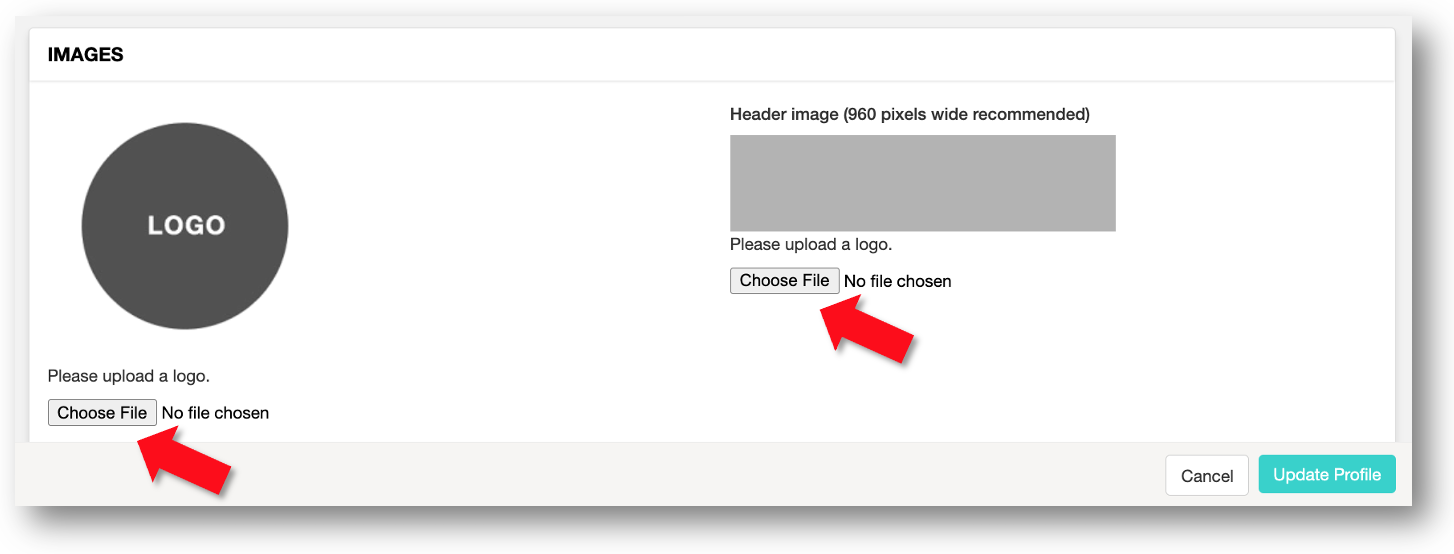
- Optionally, you can upload a logo image and/or header banner image for your exhibitor profile by clicking Choose File under Logo or Header Image.
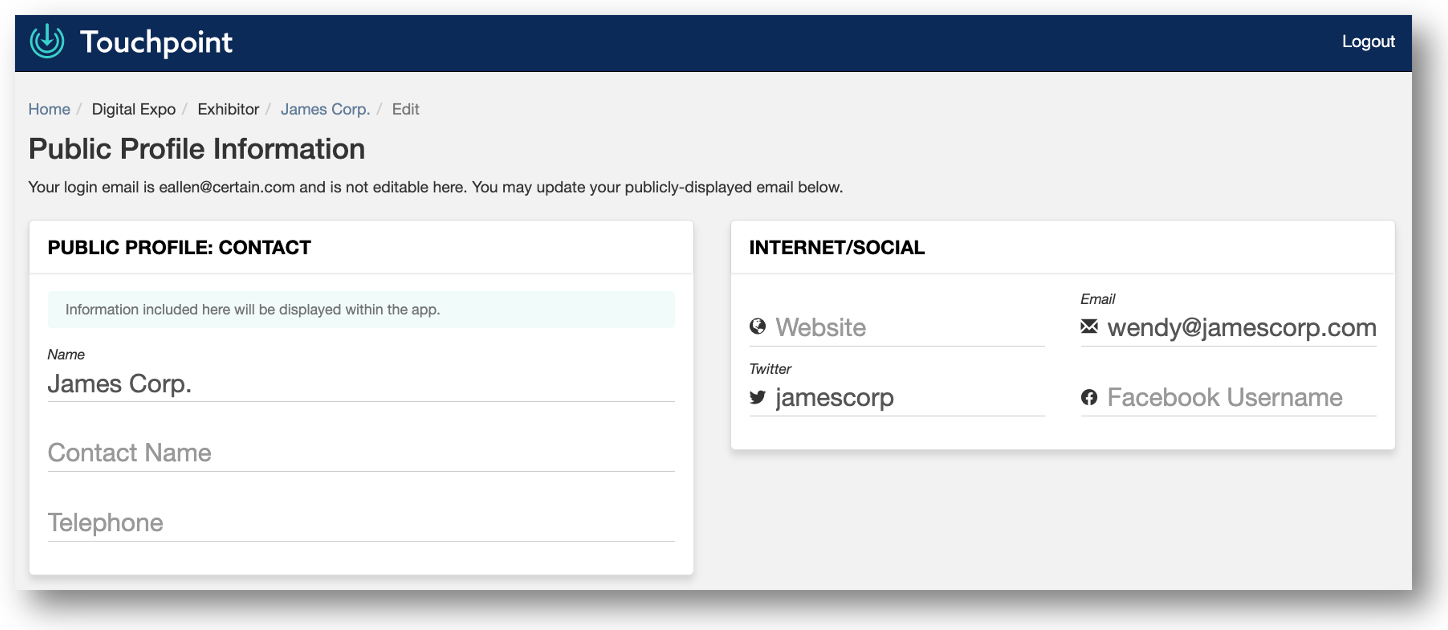
- In the designated fields, you may edit your company/organization Name, add a Contact Name & Phone Number, and add Internet/Social details.
- At the bottom of the page you may type or copy and paste text for your Description.
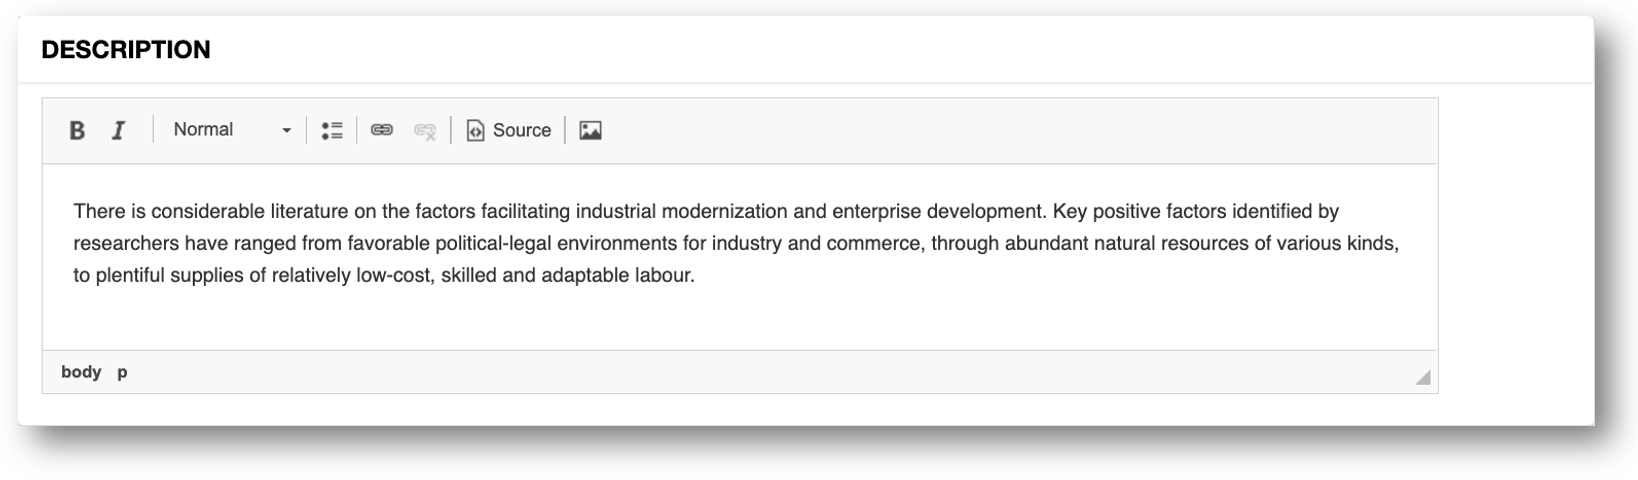
- Select “Update Profile” at the bottom to save and display this information in the app.
Uploading a file or related link on the VIP Portal
Exhibitor VIP Admins can upload PDF files and/or other related links to their exhibitor profile through the VIP Portal.
- Click “Edit” at the bottom of the page.
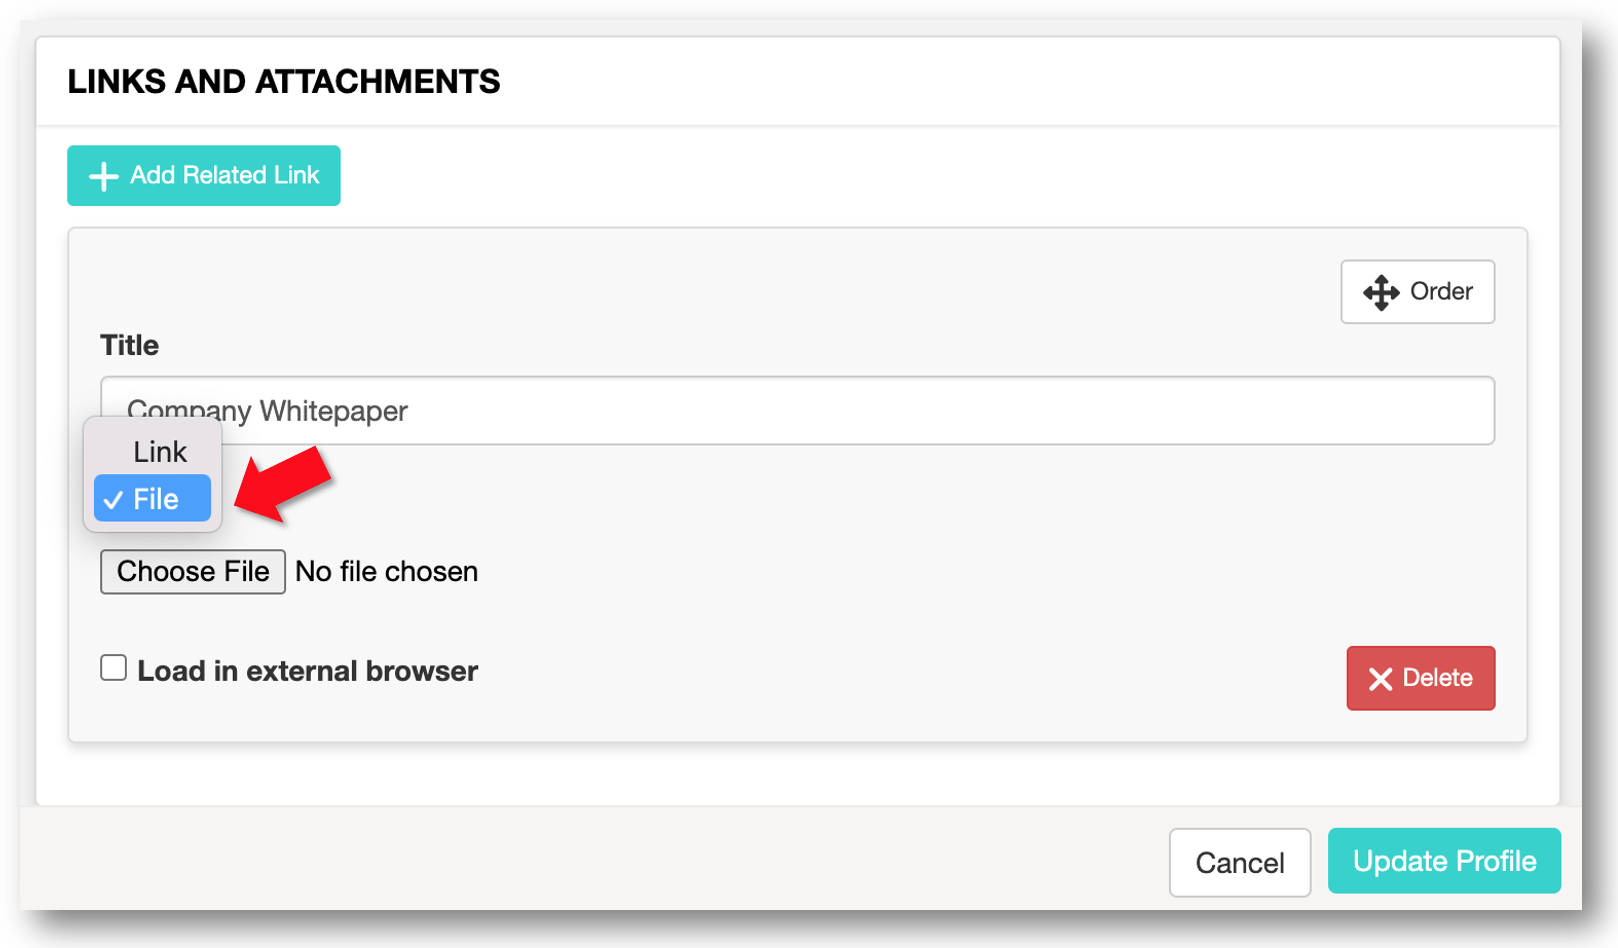
- Select “+ Add Related Link” at the bottom of the page, and enter a title for the button (e.g. ‘Company Whitepaper’).

- Select the “File” option from the dropdown and “Choose File” to upload your PDF.
- Select “Update Profile” at the bottom to save.
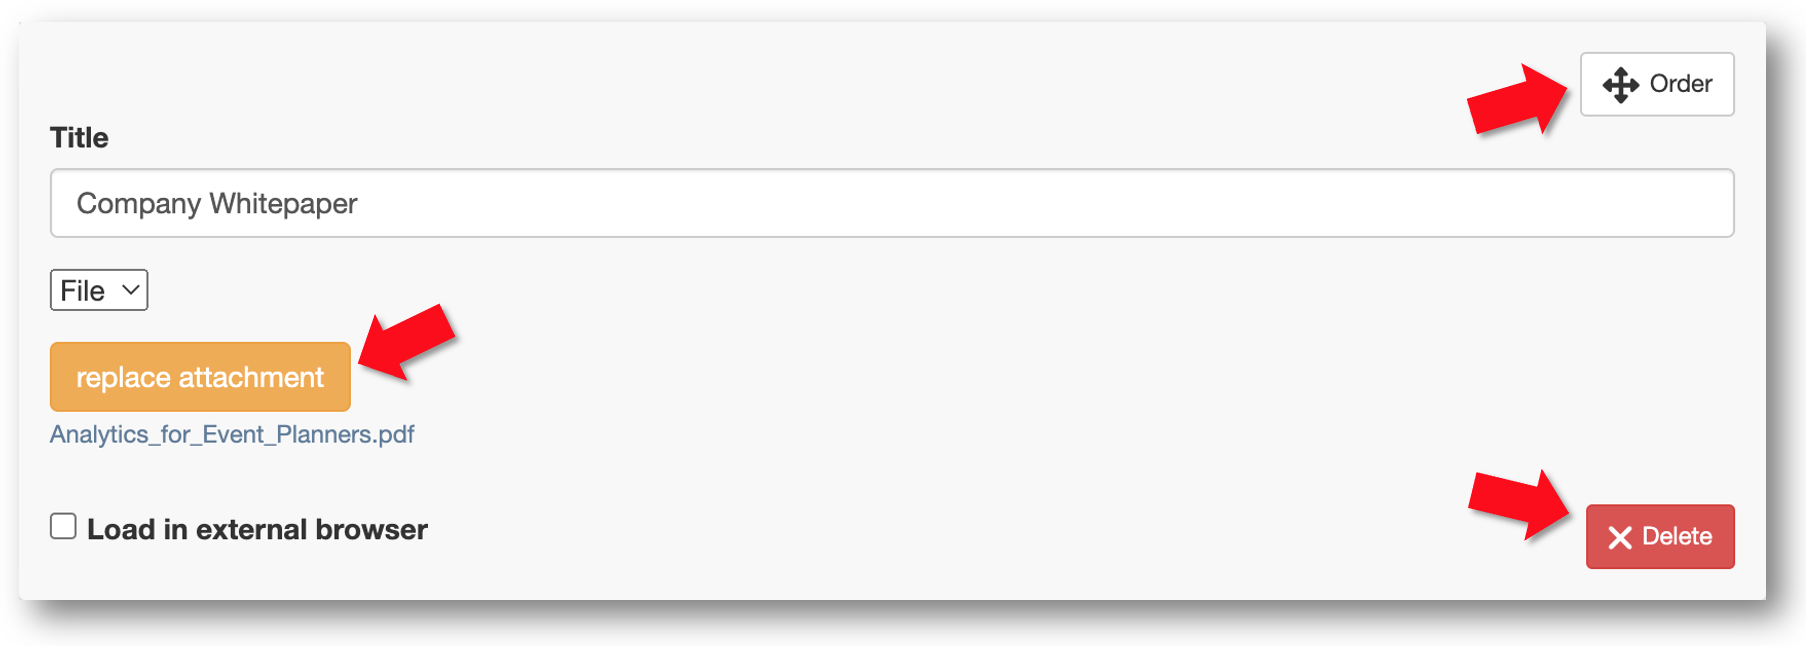
- If you are uploading multiple documents you may reorder them by clicking & dragging the “Order” button. You may replace your file with “replace attachment” or delete your file with “Delete”.
Registering additional booth staff on the VIP Portal
If booth staff have not already registered for the event, Exhibitor VIP Admin can register additional booth staff through the Exhibitor VIP Portal so that they can access the app for lead retrieval.
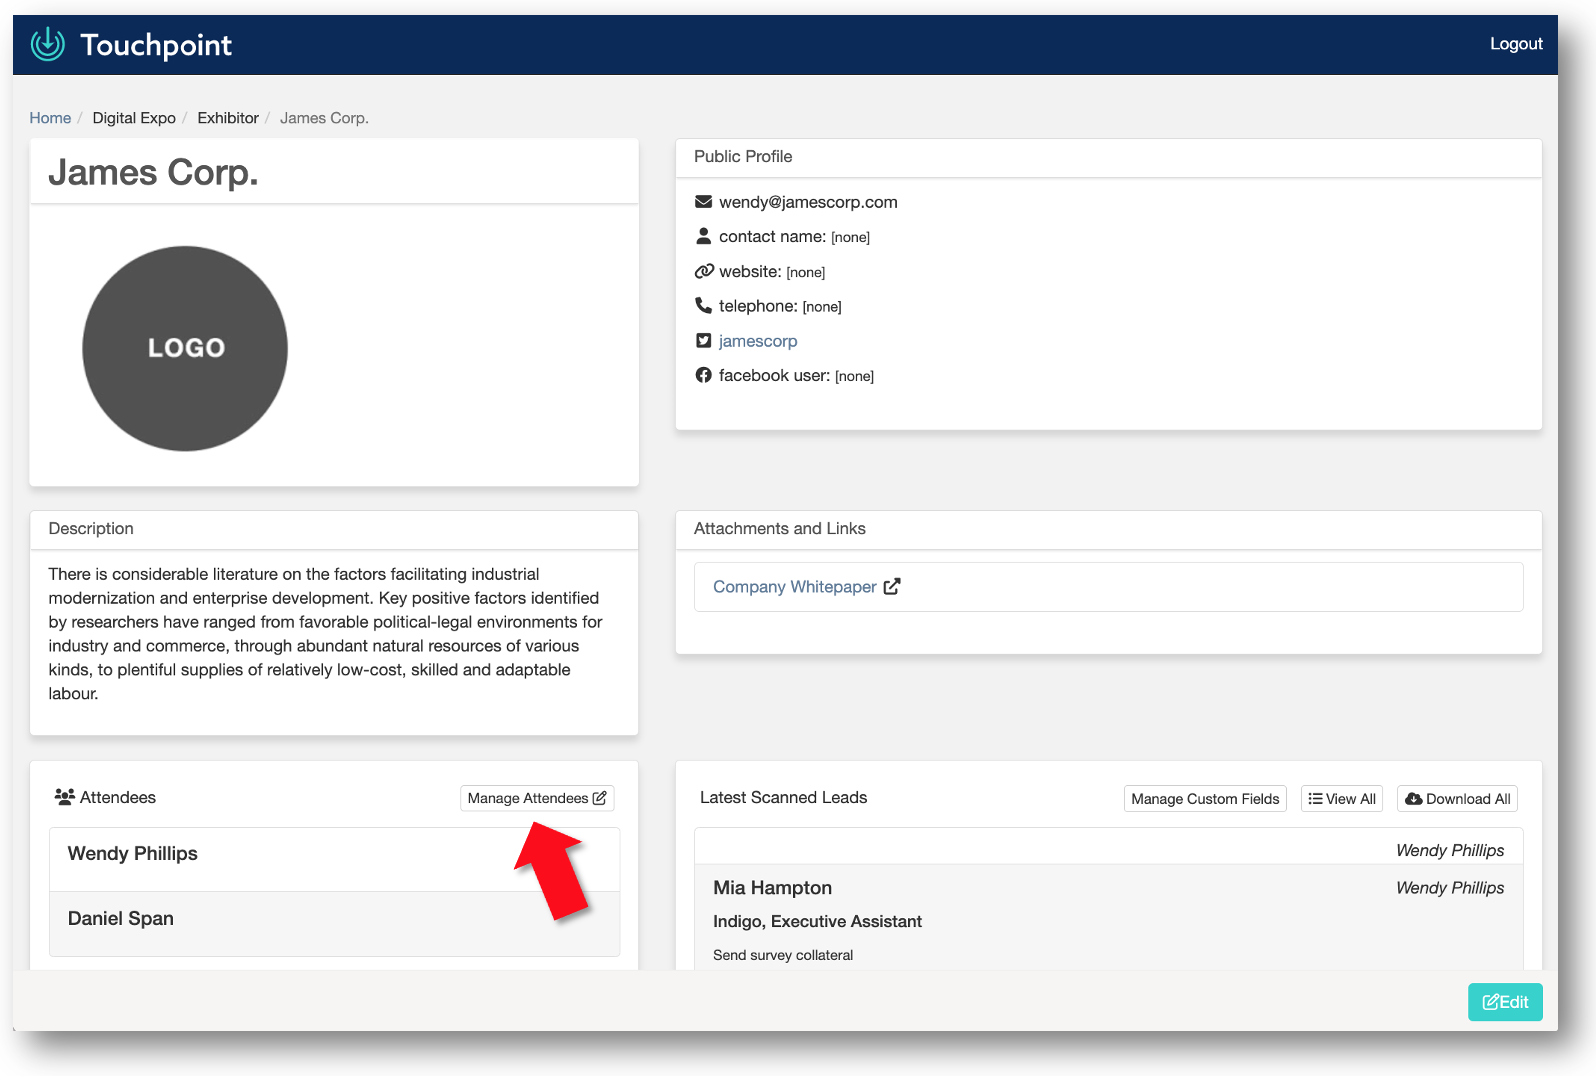
- Click “Manage Attendees” on the left side of the page in the Attendees section.
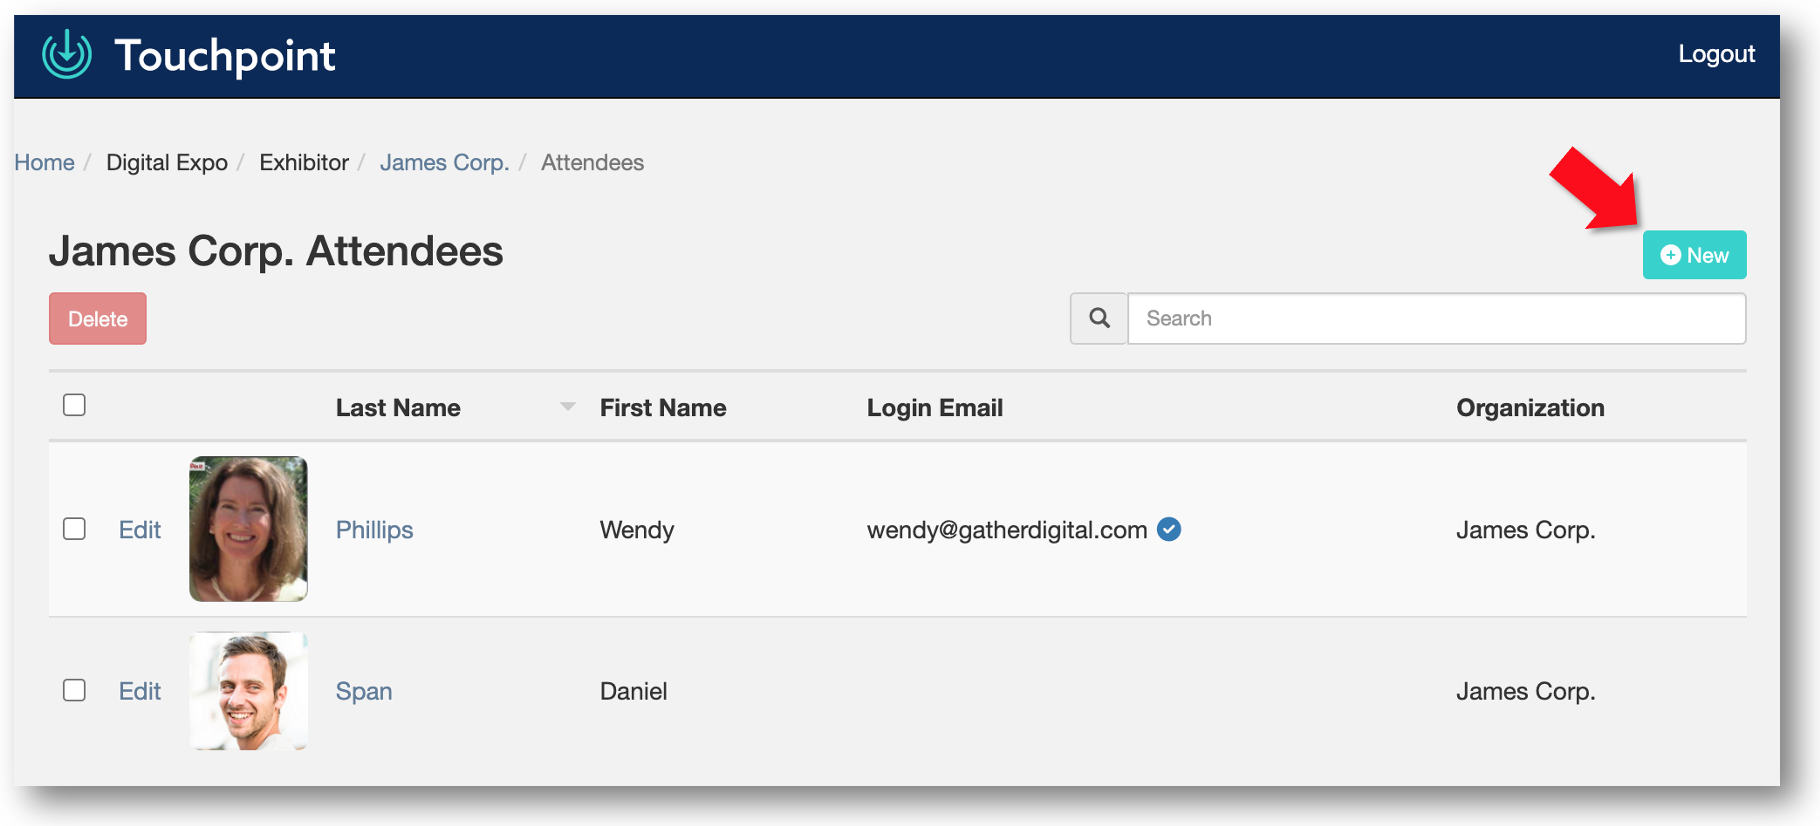
- To add a new Exhibitor Attendee (i.e., booth staff who will be scanning leads), click + New.
- At a minimum, you must add a Login Email, First Name, and Last Name for the Exhibitor Attendee. You can optionally add any other information you would like to be displayed on their Exhibitor Attendee profile on the app.
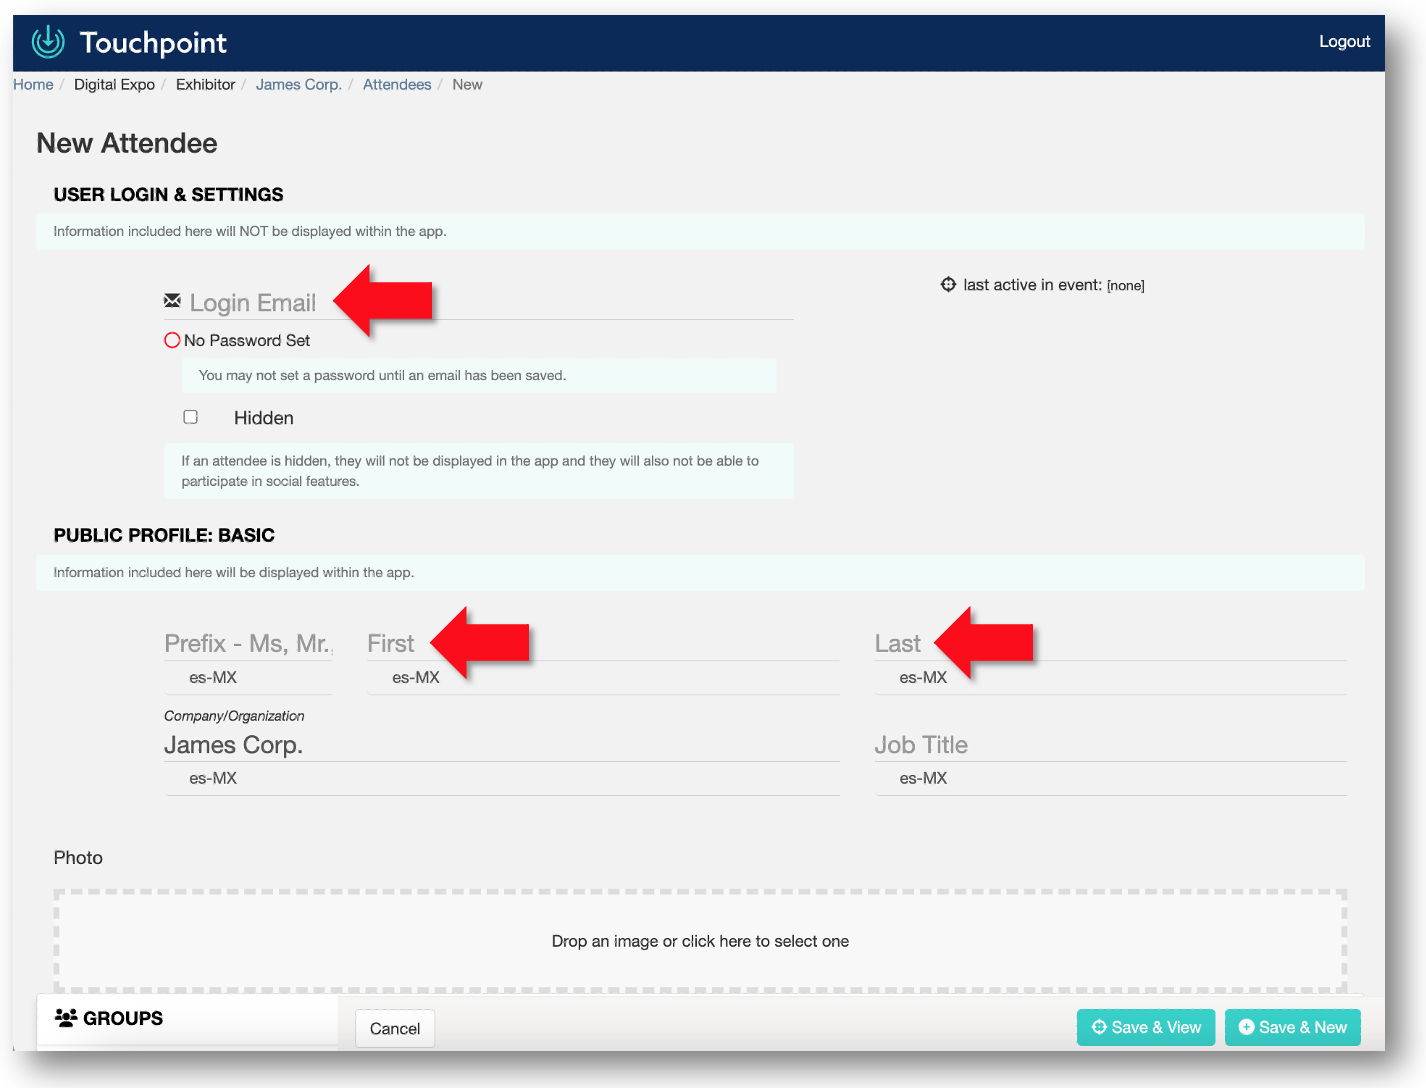
- Click Save & View to save this Exhibitor Attendee and view their profile. Click Save & New if you are adding multiple Exhibitor Attendees to save this attendee and open a new form to add another one.
Editing your booth's custom lead scanning form on the VIP Portal
The Exhibitor VIP Admin can edit their booth's custom lead scanning form if needed. This way, your booth staff can fill in any custom fields of information you wish to collect from your leads when they scan their badge.
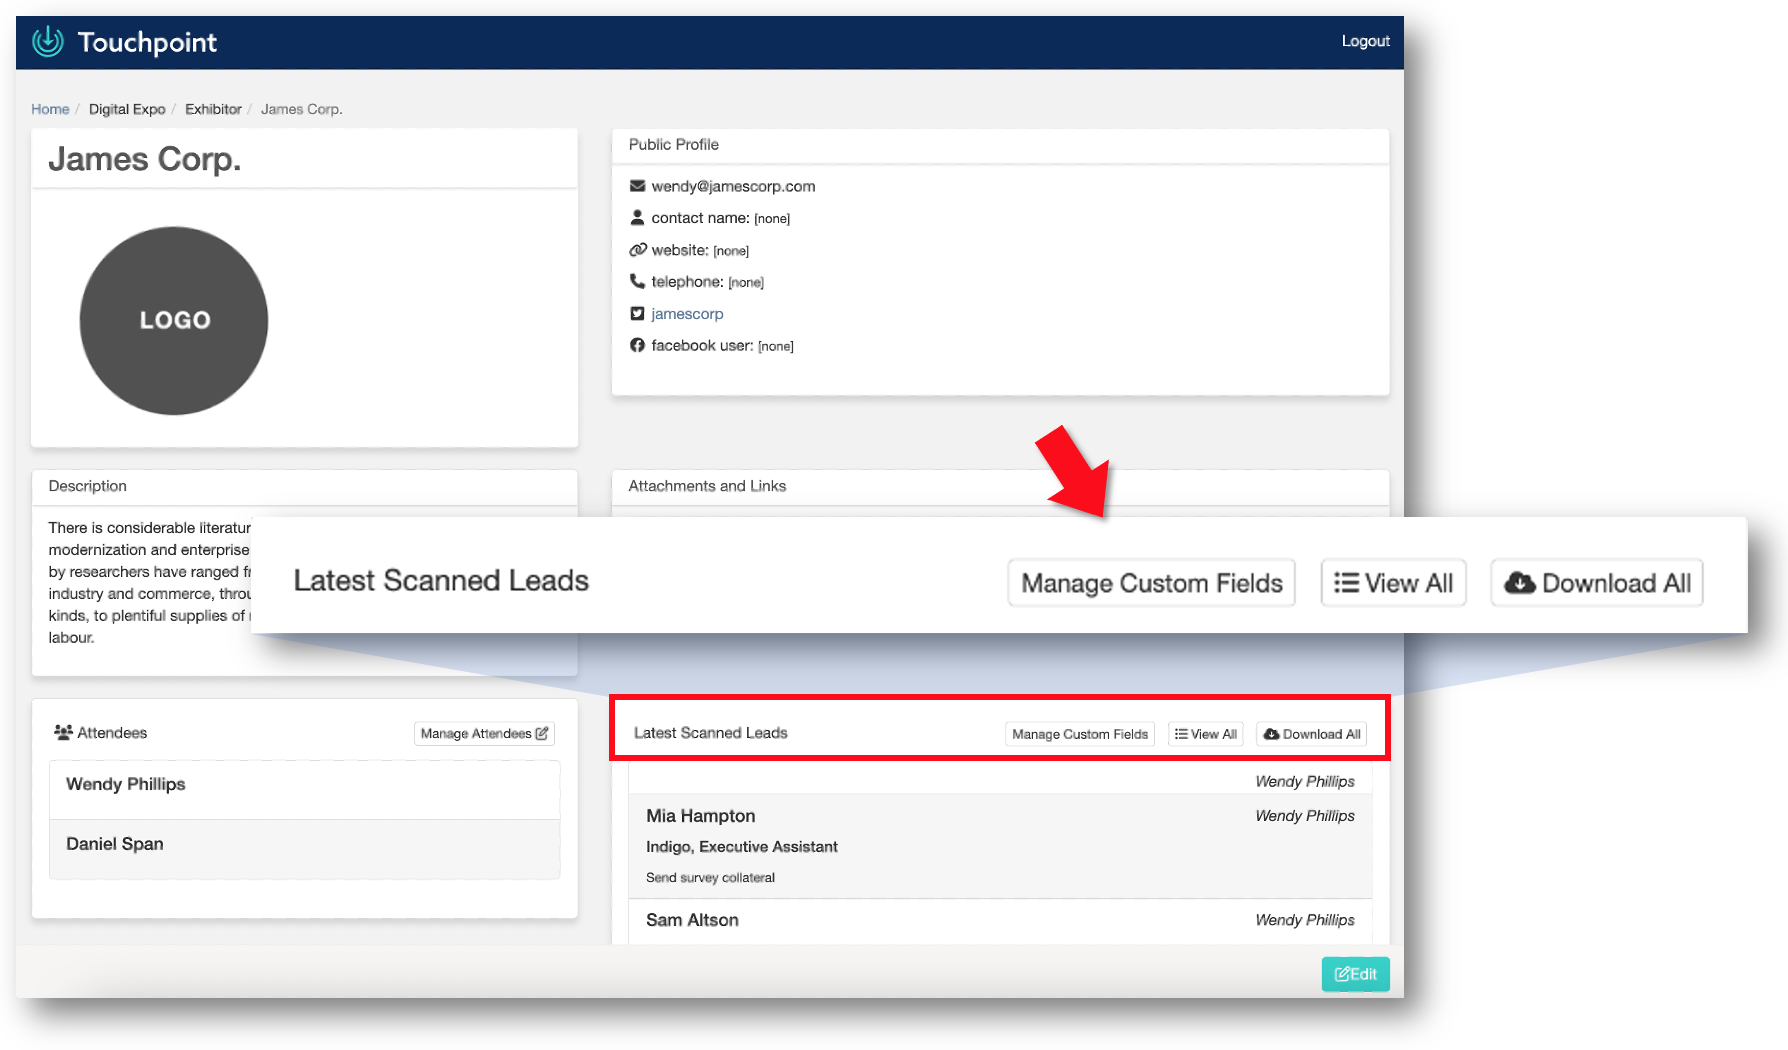
- Select Manage Custom Fields next to Latest Scanned Leads on the bottom right of the page.
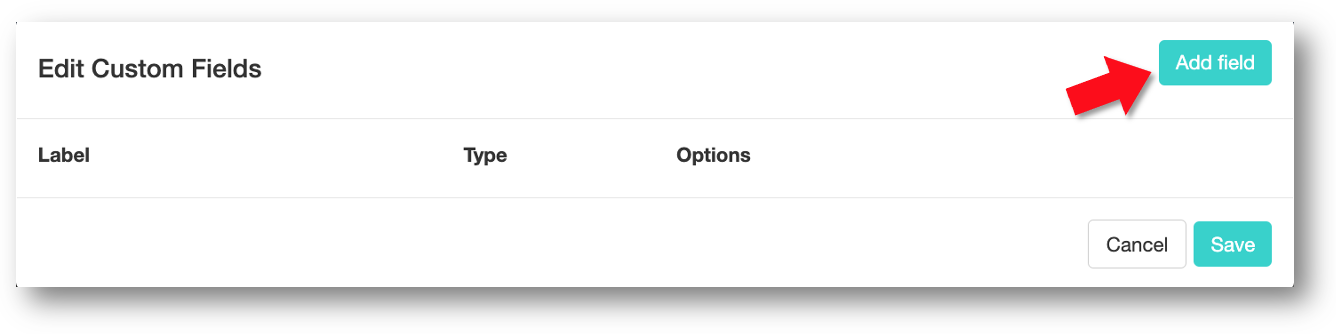
- In the Edit Custom Fields pop-up window, you can add any custom fields of information you wish to collect from your leads. To add a new field, click Add field. You may add as many fields as you like.
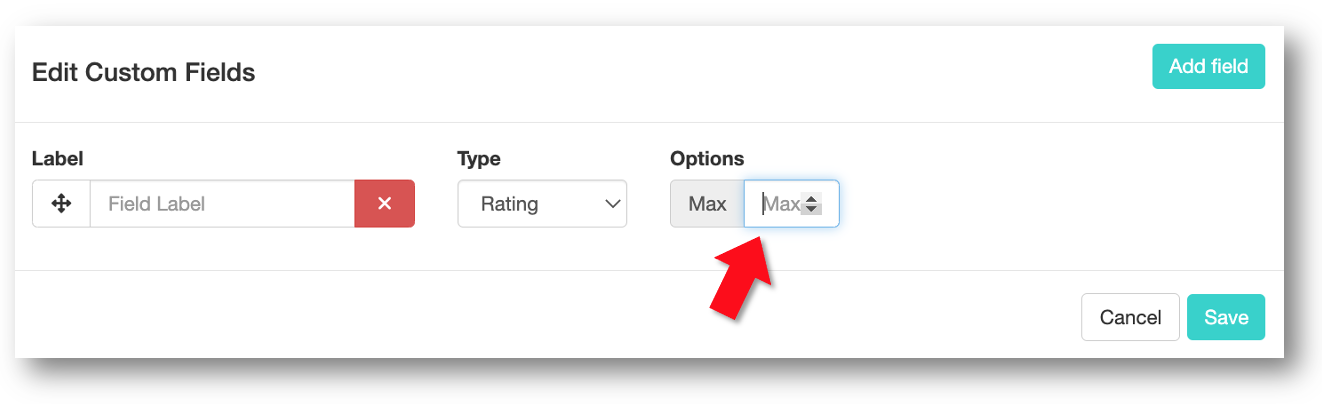
- Add a Field Label and select a Type: Text, Rating, or Choice.
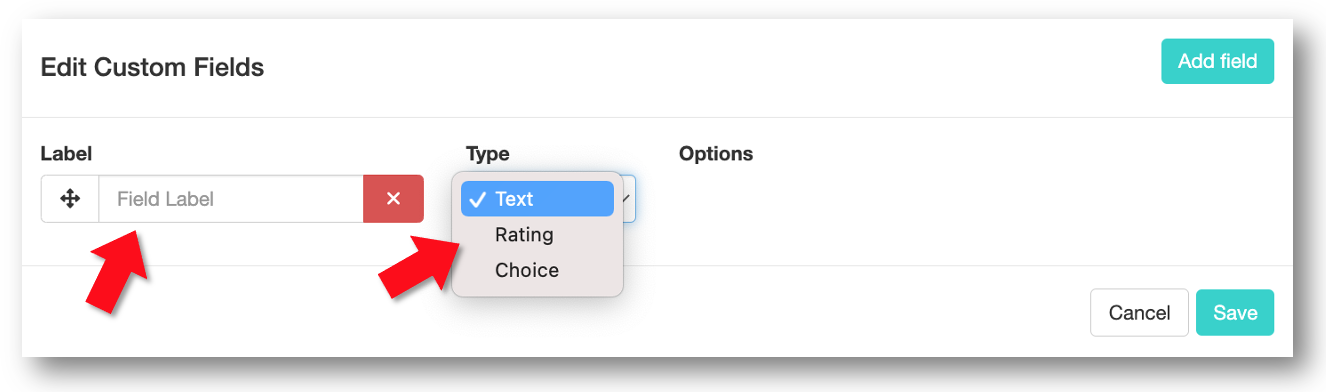
- A Text type field will allow the lead scanner to type in a text response.
- A Rating type field will allow the lead scanner to select a star rating response. You may set the max number of stars in the Max field under Options.
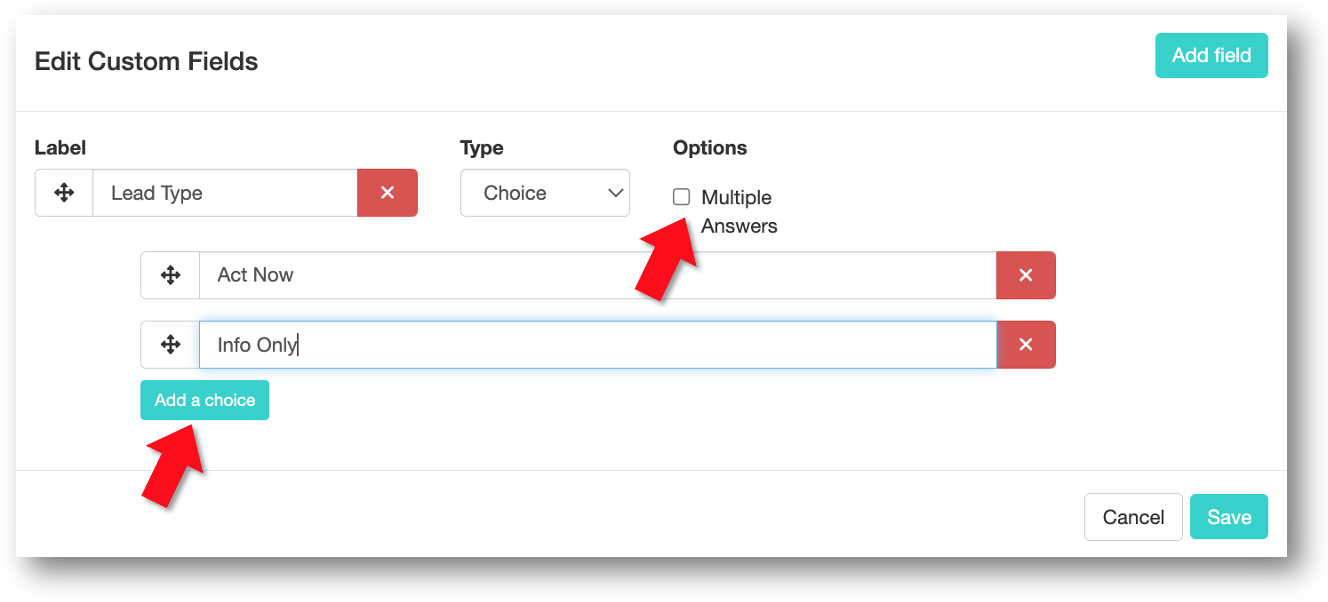
- A Choice type field will allow the lead scanner to select from multiple choices. You may click Add Choice to add each of the multiple choice responses you want to offer. You may add as many fields as you like. If you would like the field to allow multiple choices to be selected, you may check Multiple Answers under Options.
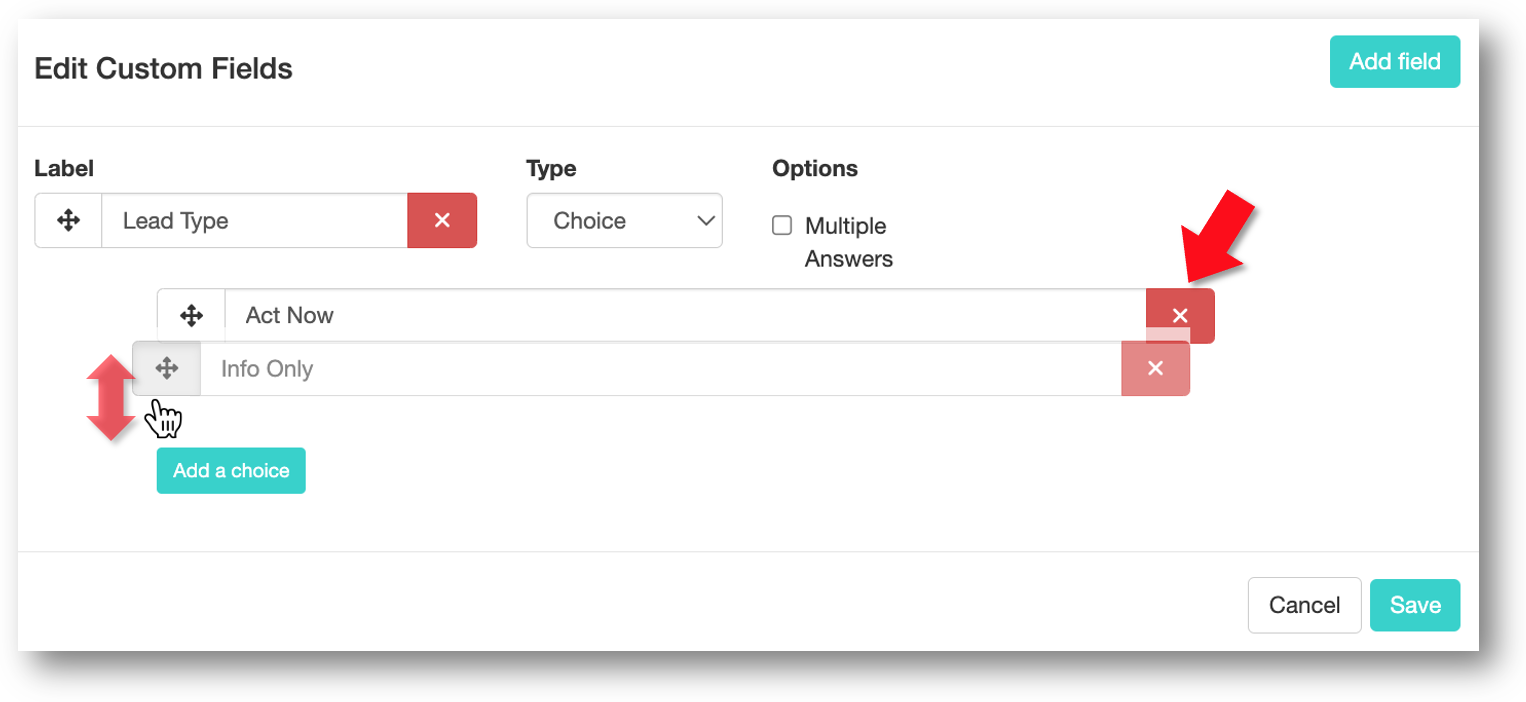
- You may reorder the choices by clicking & dragging the 4 arrows to the left of the choice field, and you may delete a choice by clicking the red X to the left of the choice field.
- Click Save.
Accessing your lead scanning report on the VIP Portal
Exhibitor VIP Admins can access a report of all leads scanned by their booth staff through the app.
The 3 most recently scanned leads by any of your assigned Exhibitor Attendees (booth staff) will be listed in the bottom right of the page under Latest Scanned Leads. Click View All to see a list of all scanned leads in the browser or Download All to export a spreadsheet of all scanned leads.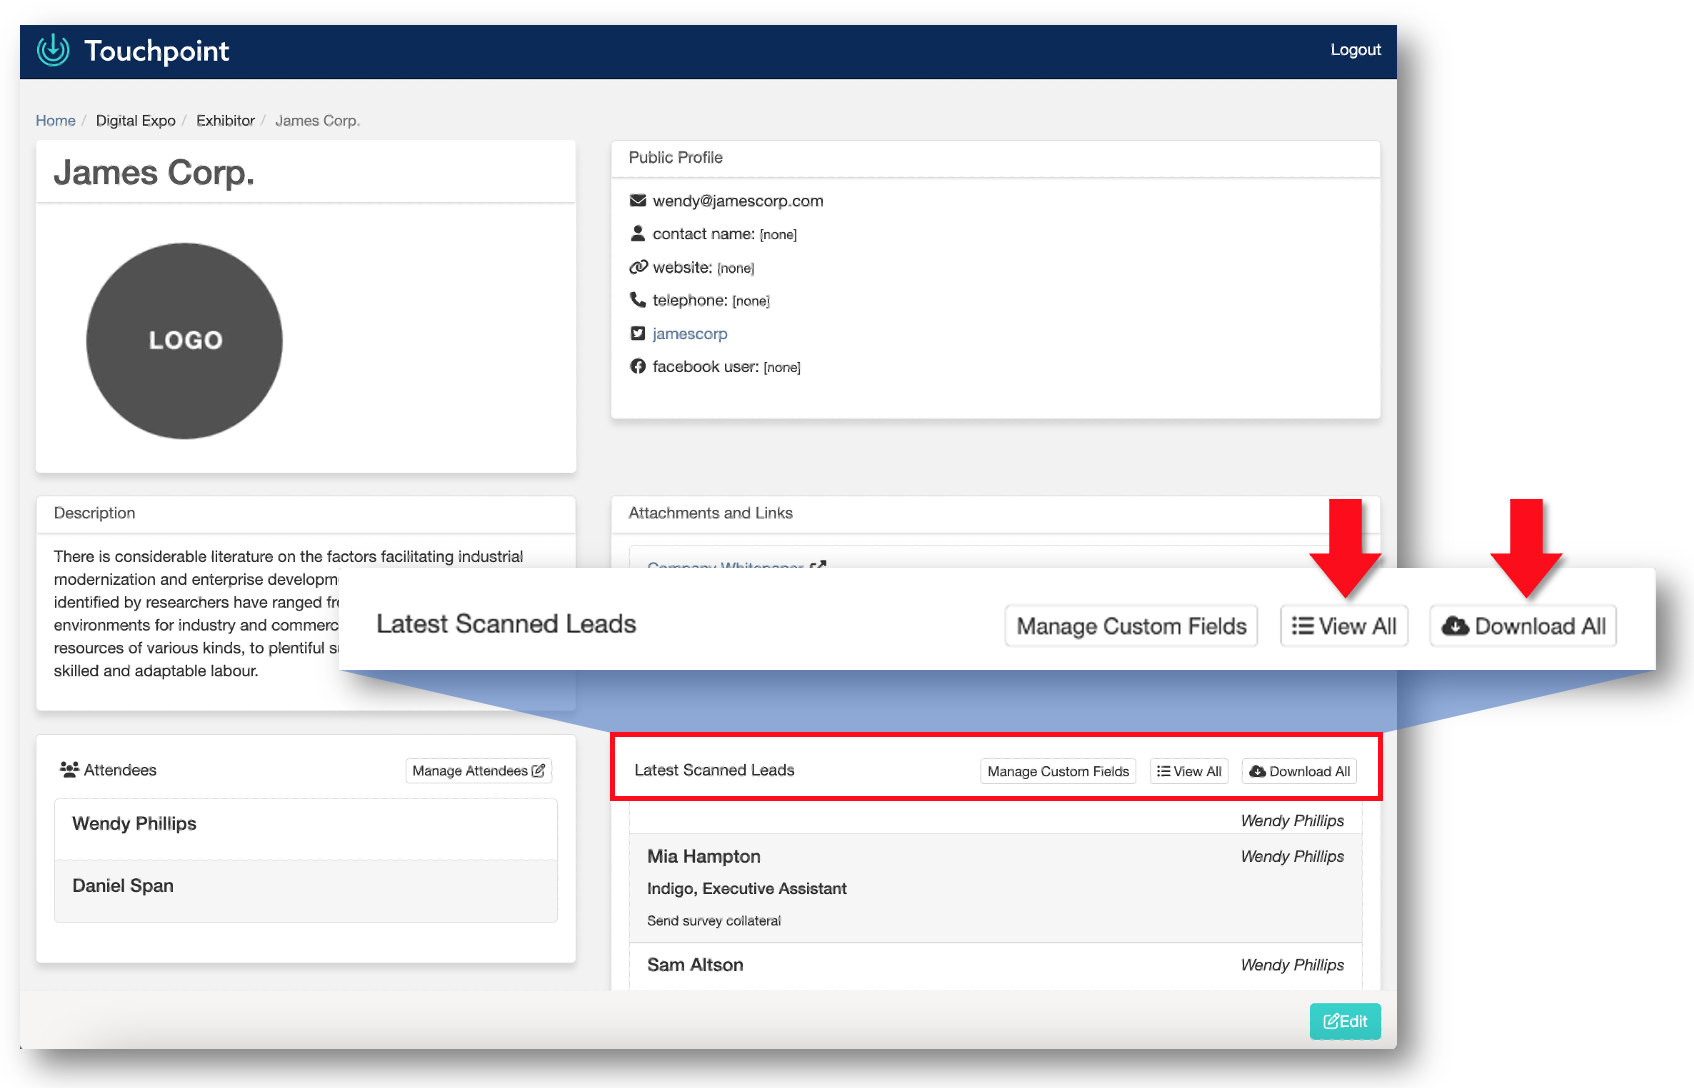
Comments
0 comments
Please sign in to leave a comment.